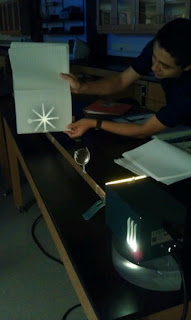
The purpose of this experiment is to examine the characteristics of a converging lens. Students will be given a lens and then students will measure the focal length of the lens. After that, students will place an object on one side of the lens in different distance and collect the characteristics of the images.
Procedure:
1. Measure the focal length. The focal length is equal to the image's distance when the object is in infinity. Therefore, we measure the image of the sun going through the lens.
f = 18.2 ± 0.2 cm
2. Now, place the object on one side of the length a distance 4f and measure the following qualities:

do: distance of the object to the center of the lens
ho: the object height
di: distance of the image to the center of the lens
hi: the image height
M: the magnification
do = 73 ± 0.2 cm , ho = 8.6 ± 0.2 cm
di= 25.7 ± 0.2 cm, hi = 3.1 ± 0.2 cm
M= hi/ho = 8.6 / 3.1 = 2.77
The image is inverted compared to the object and it is real image.
Reverse the lens and observe the characteristics of the image: The image is not changed anything (including do, ho, di, hi) compare to the previous one.
Predict what will happen to the image when half lens is cover: The image will be dimmer


When half of the lens is covered, the image will be dimmer. The reason is the light rays going through only half much of light rays from the source reach the image point. Moreover, some light rays still passing through the half uncovered lens and get the corresponding image point.The image is still visible but dimmer.
3. Move the lens to the different distance and measure the measurement:


do (cm)
|
di (cm)
|
ho (cm)
|
hi (cm)
|
M
|
Type of image
|
|
5f
|
91±0.2
|
23.6±0.2
|
8.6±0.2
|
1.8±0.2
|
0.21
|
inverted
|
4f
|
73±0.2
|
25.2±0.2
|
8.6±0.2
|
3.1±0.2
|
0.36
|
inverted
|
3f
|
54.6±0.2
|
29±0.2
|
8.6±0.2
|
4.6±0.2
|
0.53
|
inverted
|
2f
|
36.5±0.2
|
39±0.2
|
8.6±0.2
|
9.5±0.2
|
1.1
|
inverted
|
1.5f
|
27±0.2
|
63±0.2
|
8.6±0.2
|
20.3±0.2
|
2.7
|
inverted
|
4. Change the object distance to 0.5f. Predict what will happen:
The image will not appear behind the lens.
When look through the lens, the image appears inside the lens which is virtual image and upright compare to the object.


The image will not appear behind the lens.
When look through the lens, the image appears inside the lens which is virtual image and upright compare to the object.


5. Plot a graph of di vs. do

6. Create the new columns "inverse image distance 1/di" and "negative inverse object distance -1/do".
7. Plot a graph 1/di vs. -1/do
 The equation line from the data graph is:

6. Create the new columns "inverse image distance 1/di" and "negative inverse object distance -1/do".
1/di
|
- 1/do
|
0.042373
|
-0.01099
|
0.039683
|
-0.0137
|
0.034483
|
-0.01832
|
0.025641
|
-0.0274
|
0.015873
|
-0.03704
|
7. Plot a graph 1/di vs. -1/do

y= 0.9965x - 0.05283
slope = 0.9965
y-intercept = -0.05283.
y-intercept represents the inverse image distance when the inverse object distance is zero. The inverse object distance is zero when the object is at infinity. When the object is at infinity, the image distance is equal to the focal length. Therefore, the y-intercept is the inverse focal length.
So, 1/f = 0.05283 -> f =18.929
% error of the focal length of the lens from measuring the image of the sun and measuring the image of the close object.
% error = (18.929 - 18.2)/ ((18.929+18.2)/2) = 3.9%
8. From the equation line from the graph. write equation that relates di and do.


Summary:
Based on the purpose of this experiment, the focal length of the lens is successfully measured by measuring the image distance of the sun and the image distance of the close object. The % error between the two focal length can be from the uncertainty of measurements, the sun is assumed to be at infinity, and the errors when doing the experiment. Students were experimentally taught the characteristics of the lens through this experiment.
Based on the purpose of this experiment, the focal length of the lens is successfully measured by measuring the image distance of the sun and the image distance of the close object. The % error between the two focal length can be from the uncertainty of measurements, the sun is assumed to be at infinity, and the errors when doing the experiment. Students were experimentally taught the characteristics of the lens through this experiment.
No comments:
Post a Comment